

Here’s a secret the fashion industry doesn’t advertise: most people can’t tell a £30 blazer from a £300 one at conversational distance. What they can tell — instantly, unconsciously — is fit, fabric, condition and coherence. That’s why some people look expensive in Primark and others look scruffy in designer. Here’s how to make cheap clothes look more expensive, whatever your budget.
The expensive “look” isn’t about logos or price tags — it’s a set of visual signals: clothes that fit properly, fabrics that drape rather than cling, everything clean and pressed, colours that harmonise, and nothing fighting for attention. Every one of these is achievable cheaply.
How to make cheap clothes look more expensive
The short answer: fit, fabric choice, and finishing details. A £20 dress that fits perfectly outshines a £200 one that doesn’t. Here’s the full breakdown — what to look for, quick fixes, and where to spend versus save.
Fit: the 80% rule
Fit is the single biggest differentiator between cheap-looking and expensive-looking. A £15 top in your exact size looks better than a £80 one that’s too big. When shopping budget: size for your largest measurement and tailor down (taking in is cheap; letting out is often impossible). Check the shoulders (seams should sit at the shoulder bone), the trouser break (no pooling fabric at the ankles), and sleeve length.
Then find a tailor. This is the highest-ROI fashion spend in existence: hemming trousers (£8–£12), taking in waists (£10–£15), shortening straps (£5–£8). A £25 dress plus £12 of alterations looks like a £100 dress. Everyone who consistently looks polished on a budget has a tailor — now you know why.
Fabric and details that signal quality
Certain things read “expensive” regardless of price:
- Natural-look fabrics: Cotton, linen, wool-blends and good viscose drape better than shiny polyester. Check labels — a £20 cotton shirt beats a £20 polyester one every time. Matte beats shiny; texture beats flat.
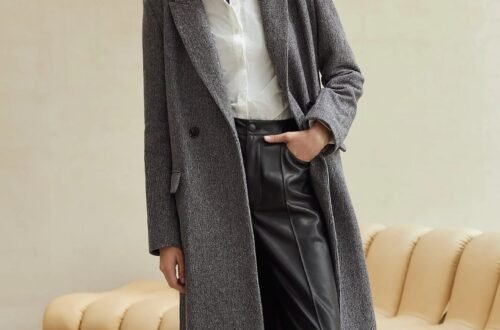
- Structured pieces: A blazer, a structured bag, a proper coat — structure reads as quality. One structured layer sharpens everything under it.
- Monochrome and tonal dressing: Head-to-toe one colour (or close tones) looks instantly luxe — it’s why the all-black outfit is a cliché. It also hides cheap fabric brilliantly.
- Minimal visible branding: Nothing dates cheap clothes faster than loud logos. Plain always looks more expensive.
- Good buttons and hardware: Swap cheap plastic buttons for nicer ones (£2 a card, ten minutes with a needle) — a tiny change with outsized impact. Same for bag hardware: gold-tone and weighty beats plasticky.
The grooming multiplier
Expensive-looking people are groomed-looking people: steamed or ironed clothes (a £25 handheld steamer is transformative), clean shoes (wipe them — scuffed shoes undo everything), neat hair, maintained nails, lint-rolled dark fabrics. None of this costs money; all of it reads as money. Our guide to removing stains from white shirts and caring for leather shoes covers the maintenance side.
Styling habits of expensive-looking dressers
Tuck it in: A front tuck or full tuck defines the waist and looks intentional — untucked everything reads sloppy. Cuff and roll: A neat sleeve roll or jean cuff shows the ankle/wrist and looks deliberate. Third piece rule: Add a blazer, cardigan, scarf or jacket — three pieces always look more considered than two. Accessorise minimally: One or two quality-looking pieces (see our accessories guide) beat a jumble. Match your metals and keep it simple.
Colour strategy matters too: navy, camel, grey, white, black and olive are the “expensive neutrals” — they look rich in any fabric, unlike neons or pastels which expose cheapness. Build your wardrobe around them (our capsule wardrobe guide is built on this principle) and add colour in small, confident doses.
What gives cheap away (avoid these)
Pilling (a £8 fabric shaver fixes it in minutes), loose threads (snip them), wrinkled everything, visible wear (faded blacks, stretched necklines — dye or retire them), too-tight clothing (cheap fabric under tension looks cheaper), and plastic-looking shoes. A quarterly wardrobe maintenance session — de-pill, snip, steam, polish — keeps the whole collection looking intentional.
The bottom line: looking expensive is a set of habits, not a budget. Fit, fabric choice, tailoring, grooming, and restrained styling — master those five and the price tags become invisible. The best-dressed person in the room is rarely the one who spent most; it’s the one who understood the assignment.
The £50 outfit challenge: proof of concept
The challenge: build a head-to-toe “expensive-looking” outfit for £50. Charity shop: wool-blend blazer (£12), silk scarf (£3). Primark: plain white tee (£4), black skinny jeans (£13). TK Maxx: structured handbag (£15). Shoes: already-owned loafers, cleaned and polished (£0). Total: £47. The result: blazer + tee + jeans + structured bag + polished shoes + silk scarf — the exact formula from the expensive-looking playbook, for less than a single high-street dress.
Why it works: the blazer provides structure (the expensive signal), the monochrome palette looks luxe, the structured bag lifts everything, and the polished shoes and scarf add the finishing intention. Nobody — literally nobody — can price this outfit at conversational distance. The £47 version and the £470 version are distinguished only by fabric hand-feel up close and label-checking.
The ongoing system: maintain a “polish kit” — handheld steamer (£25, one-time), lint roller (£2), shoe polish (£5), fabric shaver (£8), needle and thread (£3). Total: £43, lasting years, and it makes every outfit look more expensive. The challenge proves the article’s thesis: looking expensive is 20% clothes and 80% everything else — fit, fabric choice, tailoring, grooming, restraint. Spend the £50 on the system, not the label, and you’ll look expensive in everything you own. That’s not a trick — it’s just how visual perception works.
The fit checklist: 60 seconds per garment
Run every purchase (and your existing wardrobe) through this checklist. Shoulders: seams sit at the shoulder bone — the foundation of fit. Too wide looks sloppy; too narrow pulls. Chest/bust: no pulling, gaping or straining — buttons should close without stress. Waist: defined or definable — you should be able to pinch 2–3cm (not 10cm) at the waist of fitted items. Hips: fabric skims without clinging or ballooning — the “hand test” (slide your hand between fabric and body; it should move freely but not swim).
Length: sleeves hit the wrist bone, trousers break correctly for your shoes, skirts hit your flattering point (see our midi guide). Movement: sit, reach, walk — the garment should work in motion, not just in the mirror. The back view: always check — pulling, bunching and gaping hide behind you. The 10-second rule: if you’re tugging, adjusting or justifying in the fitting room, you won’t wear it. Put it back.
Fit vs size: the number on the label is meaningless — vanity sizing means a 12 in one brand is a 10 in another. Buy the fit, not the size. Cut the labels out if the number bothers you (many people do — it’s liberating). The tailor’s eye: learn to see what can be altered (hems, waists, sleeves — cheap fixes) versus what can’t (shoulders, rise, fundamental proportions). This distinction turns shopping from frustrating to strategic — you stop hunting for perfection and start buying potential. Fit isn’t about having a “good” body; it’s about clothes that fit the body you have. The checklist makes it systematic instead of mysterious.
WRAP’s Love Your Clothes campaign is full of practical ideas for extending the life of your wardrobe — from repairs to restyling — saving money and waste at once.



One comment on “How to Make Cheap Clothes Look Expensive”